FINAL UPDATE: SONY REFUSING TO HONOR WARRANTY AFTER JAN 2024 SYSTEM UPDATE BROKE TV CASE# 09315620 UPDATE2: Still Drops on Wired Ethernet! UPDATE: Still Not Resolved! Frequent Wi-Fi Disconnects on Sony XR55A95K 55 inch BRAVIA XR A95K 4K HDR OLED TV with Smart Google TV 2022 Model

After a recent update to my Sony Bravia XR55A95k Model 4K VH21 television – Firmware PKG6.7480.0852NAA, Android TV OS version 10 security patch level September 1, 2023 Kernel version 4.19.75 (#1 Thu Nov 2 10.49.42 JST 2023) Android TV OS build BRAVIA_VH21_M_UC-user 10QTG3.200305.006.S362 674801 release-keys, I began getting frequent Wi-Fi drops about every 10 to 15 minutes which was pausing/interrupting Hulu, IPTV, VLC and any other network-accessing service – local or internet.
UPDATE2 2/14/2024: Also still drops even when hard-wired via Ethernet port & cable direct to my Google Fiber router and Wi-Fi turned off. SONY Tier-1 support has agreed to send to Tier2 support to replace/repair the TV.
UPDATE3 4/15/2024: Beyond question this is the fault of the TV and only started after firmware and Google TV update in January. EVIDENCE:
– ZERO issue with this TV for 10+ MONTHS prior to this update
– Eliminated remote as the problem by removing batteries, still get network drops
– 3 Other TVs play on same network and same sources without drops, always have, and still do.
– SONY TV is only one that drops: drops on WiFi or wired, local content or internet content. Even dropped while multiple Sony techs had remote-in sessions going into TV and each tech promptly made excuses when we pointed it out. (validates TV as only remaining component and is 100% unique component to have this issue – not apps, not internet provider, not WiFi or wired equipment)
– Multiple Apps on TV have the issue, so it is no single app on TV (VLC, Media Player, Hulu, IPTV, Netflix, Prime, multiple streams both local and external, not experienced on other TVs with same apps
– Replaced Google Fiber hardware and network switches, same problem (eliminates network hardware)
SONY SUPPORT FROM LOWEST TO TOP TIER STILL REFUSES TO HONOR THEIR WARRANTY AND USE STONEWALL TACTICS REPEATING SAME TESTS OVER HALF DOZEN TIMES NOW – THIS IS A CLEAR BREACH OF CONTRACT AND A BREACH OF CUSTOMER TRUST! DO NOT BUY FROM SONY IF YOU VALUE A WARRANTY AND TRUST / HONESTY!

In an attempt to diagnose the issue, I was able to rule out my internet service, internet router, local servers by way of testing other TVs and accessing the same resources – Hulu, my local NAS server, etc.

The next step was to try removing the Sony’s Google-TV Wi-Fi connection to my router and re-establishing it, which did not resolve the issue. However, I noticed an interesting setting in that same menu section: “Scanning Always Available” which was turned on. I turned it off and it seems to have resolved the issue! Let me know if it works for you as well.
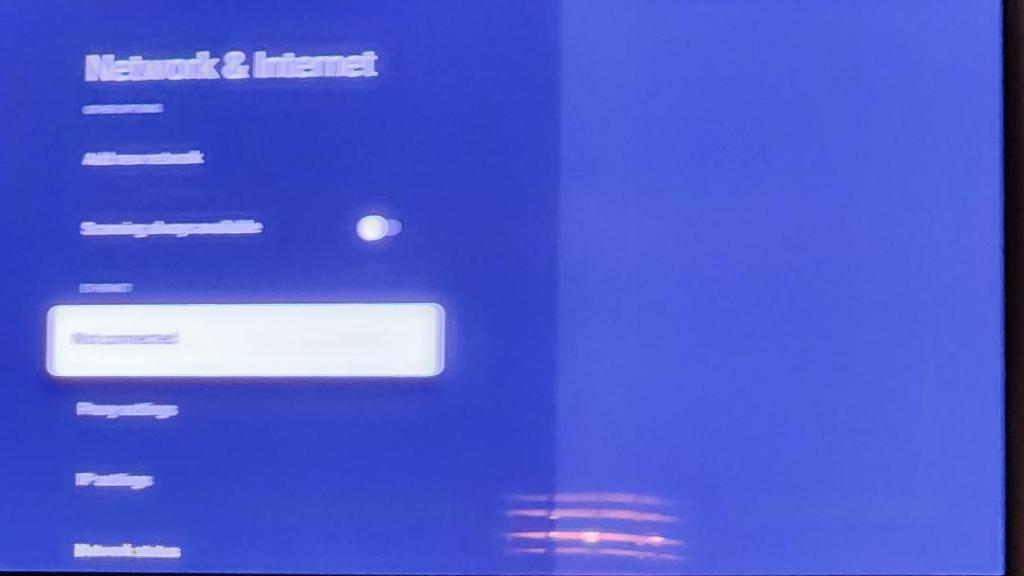
Network & Internet>Scanning Always On>YES/No

UPDATE 1/10/2024: Iiiiits baaack! The above “fix” barely lasted 12hrs and the issue has unfortunately returned.
UPDATE 1/12/2024: Turned off Wi-Fi completely and went to a wired Ethernet LAN connection. STILL the same problem persists. As this issue does not occur on any of my 3 other TVs on the same intranet & internet. Therefore, it is CONFIRMED – IT IS AN ISSUE WITH THE LAST SONY BRAVIA 4K VH21 SYSTEM UPDATE!

Try all these Sony suggestions as well: https://www.sony.com/electronics/support/articles/00184183 They did not resolve it for me:

  • Check that TV is connected to the correct Wi-Fi router (not someone’s open mobile hot-spot)
  • Check signal strength is sufficient (at least 2 bars, preferably 3 or higher)
  • Restart TV via SETTINGS> SYSTEM menu option
  • Restart TV by unplugging power, waiting a few minutes, plugging back in
  • Power-cycle and reboot the Wi-Fi router
  • Move the nearest Wi-Fi device further away from TV (AND hubs, Bluetooth devices etc)
  • Check the frequency band setting of your router (for dual-band routers). Depending on your Wi-Fi router, the 2.4GHz, 5GHz, or 6GHz frequencies may be available. If 5GHz or 6GHz frequency bands are available, we recommend using one of those frequencies. (The availability of 6GHz depends on the country)
  • Check if you also have a network (Ethernet) cable connected to your TV. If so, when using Wi-Fi, try disconnecting the network cable from your modem/router to your TV.
  • Check if the Internet Protocol for your router is set for IPv6. If your router is set for IPv6, try disabling this setting. Mine is enabled, but I refuse to disable it since it MUST be on for my purposes.
  • Check the IP Control setting on your TV; if it’s off, try setting it to on. On the supplied remote control, (1) press the (Quick Settings) or HOME button (depending on the model) (2) Select Settings (3) Select NetworkHome network (4) Set IP control to ON

    If anyone finds a solution to this, including any way to roll back the last system update, I would love to hear from you. Please post in the comments.

    FINAL UPDATE 2/14/2024 – Sony Tier 2 Support is refusing, even on record, to replace or repair this TV
    Sony SUPPORT CASE# 09315620 is not honoring their WARRANTY after a system update in January 2024 broke my TV. Four Sony support calls to a flawed support process and I literally asked the Tier2 support rep if he was refusing to replace my TV unless I went through ANOTHER round of changes we’d already done, and he said YES! I had to do it all again FOR HIM too despite the notes saying we’d already done it AND did a Factory reset too. Incredible.
  • (call 1) 2/2?/2024 – Spoke with Eli, did troubleshooting, he remoted into the TV – changed multiple network related settings, acknowledged Wi-Fi signal was great and speed test was fine – not fixed. Suggested Factory Reset as the last remaining item on his checklist which I said I would do & return call support w/results if failed – he gave us case #09315620
  • 2/7/2024 – did Factory Reset – did not resolve the problem. Turned off WiFi and used network Ethernet cable direct to router. STILL resetting.
  • (call 2) 2/9/2024 – Spoke w/rep ? who repeated troubleshooting with multiple config changes & remote in to do speed test as well – still not fixed. Said Tier2 left at 5p so call back Monday, but they WOULD REPLACE THE TV since all troubleshooting failed to fix.
  • 2/12/2024 – Sony – Jason Tier 2 – 213.314-780# called & emailed while I was away at work for 2 days
  • (call 3) 2/14/2024 – 10:30a I called main support # & spoke w/Stephanie who refused to send me to Tier 2 and demanded we go through ALL troubleshooting AGAIN. Had to object. Ended up being put on hold repeatedly.
  • (call 4) 2/14/2024 – 10:40a ish, called the direct number from email for Jason, someone else picked up, and HE demanded we go through ALL troubleshooting again. I said it was done – all of it – at least twice including multiple remote-in sessions and a factory data reset. He refused to put me in for a repair or replace.

That’s it for me – if SONY won’t honor their warranty or stand by their product, best to avoid the gamble – you may lose $2,680 like I just did. Get a different brand and avoid the Sony support disaster.


Posted in Computers and Internet, Electronics | Tagged , , , , , , , | Leave a comment

Executive Director Dan Kleinman of World Library Association Finds Himself in Hot Water as Video goes Viral of His Apparent Attendance on a Known Extremist’s Live-Stream Where She is Publicly Sexually Harassing an Individual and Kleinman Appears to Join In by Calling Out By Name

NOTE: Prior to this posting, Dan Kleinman was asked to simply make a public statement but chose to block on Twitter instead.

WARNING! The following video is VERY crude, VERY disturbing and therefore not safe for public viewing. Please do so in privacy and absent any children and other respectable humans.

Further, Kleinman has publicly stated, and the mission statement on the WLA official website states, that the World Library Association is “Making libraries better and safer for everyone”, yet his willfully chosen, unabashedly defended and CONTINUED association with this extremist suggests that may have changed. This show host has on NUMEROUS occasions stated publicly that she and her whorde does NOT support the removal of porn from the libraries of school children and taxpayers.


And last, but not least, some weird groveling fan-boy behavior by Kleinman in his tweets regarding this obviously deranged creature he’s chosen to, not just align with and support, but JOIN IN with the depravity. Lest you be mistaken that this is “just business” or “aligned specific interest”, have a look and tell me this isn’t something more.


Posted in The Latest Stink | Tagged , , , , , , , , | 1 Comment

Ford O2 Oxygen Sensor Location – Where is Bank 1 or 2 and Sensor 1 or 2? Mystery Resolved by Ford Service Support Hotline Tech

11/13/2023 FOLLOW-UP – PERSONAL PHYSICAL CONFIRMATION
I had a P0158 Code: O2 Sensor Circuit High Voltage (Bank 2, Sensor 2) come up on my car about 10 months after replacing all my O2 sensors with some inexpensive off-brand from Amazon (DOSKJOK 15716 234-4071). I cleared the code hoping it was a fluke, but after multiple code-return/clear iterations it was consistent enough to warrant replacing . I replaced the driver’s side (bank 2) rear/downstream (sensor 2) O2 sensor per this posts claimed positioning with the proper Bosch OEM unit 15716 and for over 24hrs the code has NOT returned. This confirms the accuracy of this post’s position claims! And it also confirms the potential poor quality of the aforementioned off-brand replacement O2 sensor.

Quoted as found – consistent with all my research as well.

“We are constantly getting Ford hotline calls about repeating oxygen (O2) sensor codes. Often, the technician has replaced the O2 sensor, sometimes more than once, only to have the code return.
Most of these calls revolve around identifying the location of the O2 sensor by the code. All OBD-II Ford 4-cylinder engines have two sensors: 1-1 and 1-2. On V engines, there will be two, three or four sensors: 1-1, 2-1, 1-2 and on some with dual exhaust, 2-2. The first digit in the number is the Bank ID: 1 = bank 1, 2 = bank 2. The second digit is its Location ID: 1 = close to the exhaust manifold, 2 = behind the CAT.
On all OBD-II Ford engines, Bank 1 is where cylinder No. 1 is located. On rear wheel drive, this is the passenger side of the vehicle, and on front wheel drive, it is the bulkhead (firewall) side of the engine. The driver’s or radiator side of the engine is bank 2. So if you get a code for 2-1 on a V-8 pickup, that would be the driver’s side front sensor. Or a 2-2 on a V-6 or V-8 Taurus would be the back sensor for the radiator side of the engine. Make sense?”

Posted in Automotive | Tagged , , , , , , , , , , | Leave a comment

2005 2006 2007 2008 2009 4.6L 3V Mustang GT – Typical Coolant Leak Heater Hose – Fix WITHOUT Remove Intake!

One of the more common issues with the fifth generation Mustang GT 4.6L 3V is a coolant leak can develop at around 200k miles. This coolant leak will often be smelled before it is seen, and what evidence you CAN see will come from the back of the motor and down the firewall onto the transmission area and onto the driveway/pavement underneath the center of the car. Additionally, peering between the front two intake runners with a bright LED light, you can often see the elbow leaking real-time or observe anti-freeze in the engine trough below the plumbing.

Normally, this would be a fairly invasive process to replace the one-piece metal dual-pipe heater plumbing assembly (Dorman part# 626-626 $60) which consists of the metal piping you see at the back of the motor which the rubber heater-core hoses connect to, and they run under the intake to the front of the engine – one all metal and the other partially a rubber hose & quick-connector. Replacing this entire assembly (one-piece set) involves removing the intake manifold (requiring new gaskets), and thus the fuel-rails and possibly even the battery tray to get at the hose-clamps. There is also risk of post-job intake leaks due to warping if you don’t torque in proper sequence or over-torque.
HOWEVER – I’m here to tell you that you MAY NOT have to do that! Read on for a trick I learned of and completed successfully for a lot less money and disassembly.

For my particular coolant leak, I was able to use a high-intensity LED flashlight to look through the front 2 driver-side intake rails and underneath (while running and revved to 2k rpm) to confirm what so many others on YouTube and Mustang forums were also seeing – my leak was coming from the quick-connect elbow that connects the rubber heater core return hose to the engine’s top-front coolant housing (also has the top radiator hose connection in addition to this lower return hose nipple).
NOTE: Picture is from another person’s project. I used it to demonstrate the part that almost always fails – the quick-connect elbow being pointed to. It either cracks or the O-ring fails (or both).

If you can confirm that this is your leak too, this CAN be fixed without removing your intake! I have done it, and it only cost me the price of a Dorman replacement 3/4″ quick-connector with 90-degree elbow. The Dorman part number is 800-418 and can be bought on Amazon for under $20: https://www.amazon.com/dp/B00A19MH2Y


To perform this replacement, work through the following steps (note – this would be a good time to add a new serpentine accessory belt also if you haven’t done so in a while):

  • Disconnect your battery positive cable (this is crucial – we will be moving the alternator which has a live lead attached that could short against metal!)
  • Remove the air intake duct-work and set it aside
  • Using a 1/2″ breaker bar, insert it into the serpentine accessory belt-tensioner and push down to release tension so as to remove the belt from the alternator pulley (top pulley)
  • With the belt tension now removed, remove the alternator bracket that crosses in front of the top of the alternator (there is a wire-loom that will need to be detached – squeeze it out from behind with needle-nose pliers)
  • Remove the two alternator bolts from the bottom of the alternator w/deep-well socket and pull the alternator forward and set it aside
  • You can now reach into the cavity underneath the intake with your hands. Remove your watch and jewelry or it WILL interfere and probably damage them.
  • Prepare for some coolant leakage by placing a catch-pan under your car near the back of the motor where the engine and transmission meet.
  • With your hands, try to release the quick-release elbow from the nipple by pressing down on the two external white ridges of the elbow (the pieces closest to you – not embedded in the holes of the elbow!) while SIMULTANEOUSLY pulling the elbow gently in towards the nipple, which will allow the inner-white lock-wedges to move in and then allow the elbow to slip off.
  • If that did not work, CAREFULLY pry the elbow off with a screwdriver
  • Once the elbow is disconnected from the coolant return nipple, you can usually twist out the remaining elbow from the rubber feeder line. This may involve some breakage, so be careful to remove any pieces from your rubber line afterwards.
  • Now we can remove the metal collar from the rubber return line. This is easiest done by employing needle-nose pliers and carefully (don’t want to damage he rubber line!) by pulling on the metal collar with the pliers while also applying resistance with your other hand on the rubber hose pulling gently in opposite directions. It will come off, though it takes patience and a fair amount of trying.
    NOTE: make sure all the pieces of the elbow are removed from inside the rubber hose and there is no tears or punctures.
  • Once that is done, we now can use a 3/4″ or 19mm constant-pressure clip (18mm may also work) similar to those used elsewhere on the rubber hose and slide it onto the hose about 2 inches up leaving the tabs in an easily accessible position in preparation for the new elbow to be inserted. A useful trick for this is to use needle-nose style vise grips to lock on the tabs to have the clamp in full open and then all you do is slide the clamp onto and up the hose, thus prepped for the next step.
    Use a 3/4″ or 19mm constant-tension clamp (18mm may also work)
  • Insert the new quick-connect elbow to the rubber hose at the proper angle for EVENTUALLY sliding & snapping it into place onto the nipple (not right now) and then slide the constant-pressure clip up onto it. This is easily done using the needle-nose vise grip – just pull/slide forward into place and release the vise grip. Otherwise, be patient and it will eventually land perfectly.
  • Now slide your quick-connect elbow onto the heater core coolant return nipple. Make sure it seated all the way and snugly. You should feel a “click” into place from the quick-connector. Make sure you can not now slide it off as well – mine was not on all the way initially and came right off during warm-up!
    COMPLETED fix!
  • Return your alternator into place and tighten the two lower bolts back into place.
  • Return the upper alternator bracket into place and tighten the two bolts. Reconnect the wire loom to to the bracket.
  • Return the serpentine accessory belt (add the new one if you have one) to its proper path leaving the alternator pulley for last – remove tension by using your 1/2 inch breaker bar to push down on the adjuster and loop the belt over the alternator pulley.
  • Return the air intake duct-work and tighten the 2x worm gears back down.
  • Reconnect your battery.
  • Top off the coolant tank reservoir. NOTE: the 4.6L Mustangs use GOLD/YELLOW coolant. System capacity is 3 gallons. DO NOT MIX GOLD WITH ORANGE OR GREEN COOLANT!
  • Start the car and examine for leaks – use a high-intensity light to peek through the intake runner rails. Also take a peek under the car at the back of the moor – should be no leaking or drips.
  • While engine is running, top off the remainder of your coolant reservoir and “burp” the system by massaging the upper coolant hose. With your car at operating temperature and revved up a few times to fully circulate the coolant and get all the air out of the system, do a final coolant reservoir check and top-off. Look once more for leaks by observing between the front two intake runners on driver’s side for leaking around the elbow or new antifreeze in the engine trough. Confirm there is no leaking under the car around he back of the engine.
  • COMPLETE! Leave me some comments if this helped you out, or you found some issues with my instructions. Thank you!
Posted in Automotive | Tagged , , , , , , , , , , , , , , , , , , | Leave a comment

qBittorrent v4.5.0 Now Keeps Exiting / Shutting Down / Quitting, Even Though Configured To Stay Running While Seeding – Solution / Fix

Since qBittorrent has been updated to version 4.5.0, I keep finding qBittorrent randomly quits / exits / shuts down – usually overnight. As a consequence, I lose seeding points and get nagged about “Hit-and-Run’ torrents.

I checked all my settings and I’ve confirmed qBittorrent is set to stay running when I am seeding, which should keep it alive 24/7/365 since I am seeding a LOT of items.

I ended up writing a quick work-around with a PowerShell script and run it via Windows Task Scheduler every 10 minutes. Here is my script (filename qbit.ps1):

$Prog = “qbittorrent”
$ProgExeLoc = “C:\Program Files\qBittorrent\qBittorrent.exe”
$Running = Get-Process $Prog -ErrorAction SilentlyContinue
$Start = {([wmiclass]”win32_process”).Create($ProgExeLoc)}
if($Running -eq $null) # evaluating if the program is running
{& $Start} # the process is created on this line

With your script file in place, set up Windows Task Scheduler to run it every ten minutes like this:

– Run Task Scheduler and click “Create Task” from the right-side Actions bar
– On GENERAL tab, give your task a name like “qBit”, then select option “Run whether user is logged on or not” (if on Win10 or 11, choose Configure For: option Windows Vista) and MOST IMPORTANTLY check the “Run With Highest Privileges” option AND run as the SYSTEM account (as of Win11 you can no longer run these as your local user account, even if Admin)
– On TRIGGERS tab, click NEW and select Begin: option “On A Schedule“, setting One Time and select a time ten minutes from now, Advanced settings of Repeat Task every 10 minutes for Duration of Indefinitely (all other options off except ENABLED remains checked)
– On ACTIONS tab, click NEW and select action “Start A Program“, in Program input box type powershell , and in Add Arguments input box type -ExecutionPolicy Bypass -file”C:\qbit.ps1″
– On CONDITIONS tab, the only option that should remain checked is “Wake Computer To Run This Task”
– On SETTINGS tab, options to keep checked are “Allow Task To Be Run On Demand“, “Run Task As Soon As Possible After Schedule Missed“, “Stop The Task If Runs Longer Than” and type in 30 Minutes, “If The Running Task Des Not End When Requested, Force It To Stop”, and for the setting “If The Task Is Already Running” select option “Run a New Instance In Parallel

Do understand that when this script launches qBittorrent it will indeed run and continue seeding/downloading your torrents, but it does so WITHOUT A DESKTOP WINDOW/TRAY ICON!
As a work-around to this, I also changed my qBittorrent desktop launch shortcut to be a Powershell Script which terminates any existing instance of qBittorrent (such as one with no dektop window) and launches qBittorrent with the desktop window interface. This is my Powershell qBittorrent launching script (filename q.ps1):

$Prog = “qbittorrent”
Stop-process -Name “qbittorrent”
$ProgExeLoc = “C:\Program Files\qBittorrent\qBittorrent.exe”
$Running = Get-Process prog -ErrorAction SilentlyContinue
$Start = {([wmiclass]”win32_process”).Create($ProgExeLoc)}
if($Running -eq $null) # evaluating if the program is running
{& $Start} # the process is created on this line

To use the above script in plae of your original qBittorrent desktop shortcut, create a new (or edit your existing) desktop shortcut as follows:

– Right-click an empty area of your desktop and select NEW > SHORTCUT from the pop-up menu
– in the TARGET input field, put something similar to the following:
powershell.exe -Command “& {Start-Process powershell.exe -Verb RunAs -ArgumentList \”-ExecutionPolicy ByPass -Command C:\q.ps1\”}
– click OK to save your new shortcut
– rename your new shortcut to qBittorrent

Now, when you launch qBittorrent, it will automatically terminate any background instances of qBittorrent that you cannot see and replace it with this visible instance, all without losing any of your seeding time!

Good luck, and let me know if this fix works for you as well!


Posted in Computers and Internet | Tagged , , , , , , , , , , , , | Leave a comment

How To: Access My Wyze Cameras Live on Windows Without a Cloud Subscription

As you have likely learned, there is no (free) website-based live access to your Wyze cameras. Further, there is no Windows application provided by Wyze either – only Android or Mac mobile applications. This seems to be a purposeful gap designed around promoting their “Web View” Web Cam Plus subscription for the vast majority of windows-based computer owners.

There IS, however, a very free solution! You can run the android Wyze application on your Windows computer! You do this by performing the following steps:

  • Download, install and run LDPlayer 9 – an android device simulator – onto your Windows computer from:
    https://www.ldplayer.net/other/version-history-and-release-notes.html
  • Create a Google Play Store account (recommended you create a separate one even if you already have one)
  • From within LDPlayer9, run the Google Play Store app, sign in with your account and download the Wyze app
  • Run the Wyze application and sign in
  • Now you can access your Wyze cams from Windows!
Posted in Computers and Internet, Electronics, Mobile Electronics | Tagged , , , , | Leave a comment

How To Switch / Add / Connect ZWave Yale Deadbolt (YRD210, YRD220, YRT210 or YRT220) From CPI Security to Home Wi-Fi – Using Samsung’s SmartThings Z-Wave Zigbee Hub

I ended my service with CPI Security and wanted to connect their smart-home Yale digital door lock / deadbolt to my home network since it was network-aware through built-in Z-Wave technology.

After much searching and many trial-and-error failures, I FINALLY worked out the process for making this work!

I purchased a Samsung / Aotec SmartThings Hub V3 IM6001-V3P01 (wireless 5ghz or wired 1gb Ethernet). Using the free SmartThings app on my Android phone (should also be available on iPhone) while connected to my home wi-fi network, I manually added the device to my network by selecting “add device” then selecting “hub” and following the app’s prompts. Once I had done that, the SmartThings app was also able to add a large amount of additional smart devices (plugs, light switch) and also added these devices to the app.

Samsung /Aotec SmartThings Hub V3 IM6001-V3P01

Next came the more challenging part – adding the Yale digital deadbolt with integrated ZWave Plus to the SmartThings network via the hub.

Yale YRD120 With ZWave Z-Wave


To add my Yale Digital Deadbolt to the SmartThings Hub,we must FIRST exclude the device from the hub, then include it on the hub, which we do via the SmartThings application on your mobile phone.
You do as follows:

  • Move your SmartThings hub to within 5 feet of the Yale ZWave lock
  • Launch the SmartThings App
  • go to DEVICES (icons at bottom of app screen)
  • locate and select the SmartThings Hub device (may be assigned to a room like “Livingroom”)
  • Turn OFF Secure Mode option in the immediate list of options
  • click the vertical ellipses in the top-right of the screen ‘…’ and select “Z-Wave Utilities”
  • go to your door with the Yale ZWave lock and perform the following steps in rapid succession:
    – select “Z-Wave exclusion” and the app/hub goes into delete mode
    – put the lock in LOCK position
    – press the 4-to-8 digit master code followed by # or the gear icon, then 7 followed by # or the gear icon, then 3 followed by # or the gear icon
    – you should hear an audible prompt with visible indication on your phone that the device was deleted
  • Now we can include the lock on the hub by performing the following steps in rapid succession:
    – return to the main SmartThings DEVICES screen and click the + in the top-right of the screen
    – select ADD DEVICE and scroll down to the DEVICES/SENSORS group and locate / select the DOOR LOCK icon
    – scroll to the bottom and locate / select the YALE icon
    – locate and select the YALE INTEGRATED ZWAVE PLUS option
    – follow the guided prompts to put the lock into PAIR mode (remove cover, press-and-hold the pair button on the right-top of the lock until it beeps twice and then release it)
    – the hub should detect your lock and add it to the devices list!
  • If your YALE lock is not the same as mine, there are all those other ZWave / Zigby equipped locks listed and it can walk you through the process for pairing it after walking through the generally same EXCLUSION process

Good luck, and I hope these instructions work for you as it did for me!

Posted in Computers and Internet, Electronics, Mobile Electronics, Security | Tagged , , , , , , , , , , , , , , , , , , , , , , , , , , | 1 Comment

USB Ethernet Adapter Keeps Disconnecting – Tried All Other Tricks, But This ‘How To Fix’ Was The Only Thing That Finally Worked (Nobody Else Had This Suggestion!)

I have a laptop that the built-in screen began failing upon. Since it was out of warranty ($600+ to fix) and it was now useless as a mobile laptop, I decided to put it to server duty for hosting a website. It is an Acer Spin 5 with Intel Core-I7, 16gb memory, 500GB SSD, Windows 11 Pro and running IIS with Node.JS and MySQL database.

For several months it worked perfectly, but for some reason it started going offline (within an hour) a week or so after a recent upgrade of my network to Google’s 2-gigabit fiber (from 1-gigabit). This fiber upgrade doesn’t seem likely to be the catalyst of the issue as it DID work for a few solid days after the upgrade, so perhaps it was a recent Windows 11 update? Who knows.

The usual recommendations that would typically fix this issue are as follows:

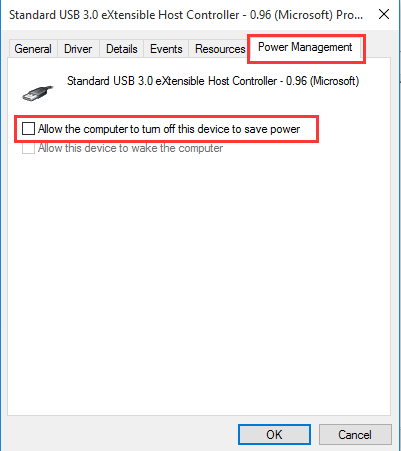
(1) Launch Device Manager and locate the following items to uncheck the “Allow the computer to turn off this device to save power” option:
Network Adapter (example Realtek USB GbE Family Controller)
USB items (1) “USB Host Controllers” (may be multiples – uncheck all), (2) “USB Root Hub” (may be multiples – uncheck all)
– Under System Devices node, (1) “Thunderbolt Controller” (may be multiples – uncheck all), (2) “Serial IO Host Controller” (may be multiples – uncheck all)

(2) Uninstall/Reinstall your USB Ethernet Adapter device:
– Run Device Manager
– Locate your USB Ethernet Adapter under Network Adapters
– Right-Click it and select “Uninstall
– Remove the adapter & reboot your machine
– Plug it back in after your machine is restarted and allow Windows Update to install the latest driver or install the latest driver manually from the manufacturer’s website
Remember to redo the above step(s) to prevent Power Management from powering off this adapter!

(3) THIS ONE IS MY OWN, AND IT SEEMS TO HAVE WORKED AROUND THIS PROBLEM (NOT EXACTLY A FIX) WHERE NONE OF THE OTHERS DID!
Add a Windows scheduled task to use Powershell to check for internet connectivity and optionally resart your Ethernet adapter every 1 minute (there are similar task scheduler procedures for Mac and Linux):
– create a checkNetRestart.ps file with the following contents (tailored to your adapter name – see windows Network Properties page to find the name):

if (‘Get-NetAdapter -Name “Ethernet 3” | Where-Object {$_.Status -eq “Up”}’)
{
Try
{
if (test-connection -Computer microsoft.com -Source 192.168.1.211 -Count 1 ) {
Write-Host “Ethernet 3 Ok”
}
else {
Write-Host “Ethernet 3 No Internet”
Restart-NetAdapter -Name ‘Ethernet 3’
}
}
Catch
{
Write-Host “ERRORED – Ethernet 3 No Internet”
Restart-NetAdapter -Name ‘Ethernet 3’
}
}
else {
Write-Host “Ethernet 3 disconnected”
Restart-NetAdapter -Name “Ethernet 3”
}

– Run Task Scheduler and click “Create Task” from the right-side Actions bar
– On GENERAL tab, give your task a name like “USBEthernetKeepAlive”, then select option “Run whether user is logged on or not” (if on Win10 or 11, choose Configure For: option Windows 10) and MOST IMPORTANTLY check the “Run With Highest Privileges” option AND run as the SYSTEM account (as of Win11 you can no longer run these as your local user account, even if Admin)
– On TRIGGERS tab, click NEW and select Begin: option “On A Schedule“, setting One Time and select a time ten minutes from now, Advanced settings of Repeat Task every 1 minutes for Duration of Indefinitely (all other options off except ENABLED remains checked)
– On ACTIONS tab, click NEW and select action “Start A Program“, in Program input box type powershell , and in Add Arguments input box type -ExecutionPolicy Bypass -file”C:\checkNetRestart.ps1″
– On CONDITIONS tab, the only option that should remain checked is “Wake Computer To Run This Task”
– On SETTINGS tab, options to keep checked are “Allow Task To Be Run On Demand“, “Run Task As Soon As Possible After Schedule Missed“, “Stop The Task If Runs Longer Than” and type in 1 Minute, “If The Running Task Des Not End When Requested, Force It To Stop”, and for the setting “If The Task Is Already Running” select option “Run a New Instance In Parallel

Good luck, and let me know if this fix works for you as well!


Posted in Computers and Internet, Electronics | Tagged , , , , , , , , , , | Leave a comment

Windows Error Message “You’ll need a new app to open this windowsdefender link”

As it turns out, this is apparently an unintended consequence of my recent upgrade of Windows 10 to Windows 11.

The solution for me was to run a command through Powershell to reapply/reset the “Security Health” Windows package. Here is the steps I took to resolve it:

1) Launch the Windows Powershell app as an administrator (use Windows Search and search for Powershell – right-click the app shortcut and select “Run as Administrator”).

2) If prompted in Powershell to “change the execution policy?” press Y and hit enter. Otherwise copy this command and paste it into the Powershell command-line and hit enter:
Set-ExecutionPolicy AllSigned

3) Copy this command and paste it into the Powershell command-line and hit enter:
Get-AppxPackage Microsoft.SecHealthUI -AllUsers | Reset-AppxPackage

This worked perfectly for me and the Windows Security feature (and the Windows Defender tray Icon) is working normally once again.

Posted in Computers and Internet | Tagged , , , , | Leave a comment

Problem Issue Error Getting Gas At Sam’s Club With Walmart+ Plus Application – SOLUTION!

I recently joined Walmart+ to get the benefit of gasoline discounts at Murphy Express gas stations (five cents off/gal) and was pleased to see I could also get gas at Sam’s Club gas stations as well.

When I went to Sam’s Club for the first time, I saw on the pump that I was supposed to use the Walmart+ App and select “SERVICES” and then “MEMBER PRICES ON FUEL” and then “USE WALMART PAY” which allows you to scan the Walmart+ QR-Code on the pump and activate it. I did exactly as instructed, and it appeared everything went fine with my phone saying it was Ok to start the pump, but then a few seconds later I received the error from my phone app “Problem with card. Use your card at the pump” which I obviously can’t do. Only Sam’s Club members can use their membership card to activate the pump, not just any Credit Card. At this point I had to get an attendant to use his card to get the pump activated so I wasn’t holding everyone up, which he happily did. I then successfully used the same credit card to pay at the pump that was attached to my Walmart+ Walmart Wallet for Walmart Pay but rejected by the scan process.


I tried this at two other Sam’s Club gas stations with the same results – card error – and had to have the attendant activate the pump for me.

The problem turns out to be with my credit card, which ironically is the Walmart Capital One Mastercard which works just fine for Walmart Scan-and-Go purchases in the store, and at the pump if the attendant activates it. Apparently this is a similar problem for other credit-card issuers who have restrictions tied to the $ pre-authorizations (some reject small amounts like $1, others reject large amounts like $100 which each Sam’s Club gas station can set independently) that gas-pumps do before you pump your gas.

SOLUTION:
My solution was to add another credit card to my Walmart Pay account (my Wells Fargo credit card) and then change to use that card when specifically paying for gas at a Sam’s Club gas station. I was then able to successfully use the Walmart+ App Walmart Pay process to activate the pump without any issues at all the Sam’s Club gas stations!


ALSO – make sure your Sam’s Club gas station is participating in Walmart+ (almost all do):
https://www.walmart.com/plus/fuel-locations

I hope this works for you as well! Good luck!

Posted in Automotive, Computers and Internet | Tagged , , , , , , , , | Leave a comment